Endpoints
A simple mental model to understand 'Endpoints' in LLM Stack is to think of them as our age old REST APIs. The only difference is that, these endpoints are powered by AI and instead of writing a business logic for each API, you can simply instruct the model to do a specific task on the input data and it will do it for you.
Now, any REST API has a defined output format, similarly, each endpoint in LLM Stack has a defined output format and can be designed by the user itself.
Tl;dr: Endpoints are simple REST APIs which are one-shot or few-shot LLM calls to do a specific task on the input data and return consistent required output format.
How to create an Endpoint?�
Creating an endpoint is straightforward:
- First, select an existing Project or create a new one
- Navigate to the 'Endpoints' section
- Click on the 'Create Endpoint' button
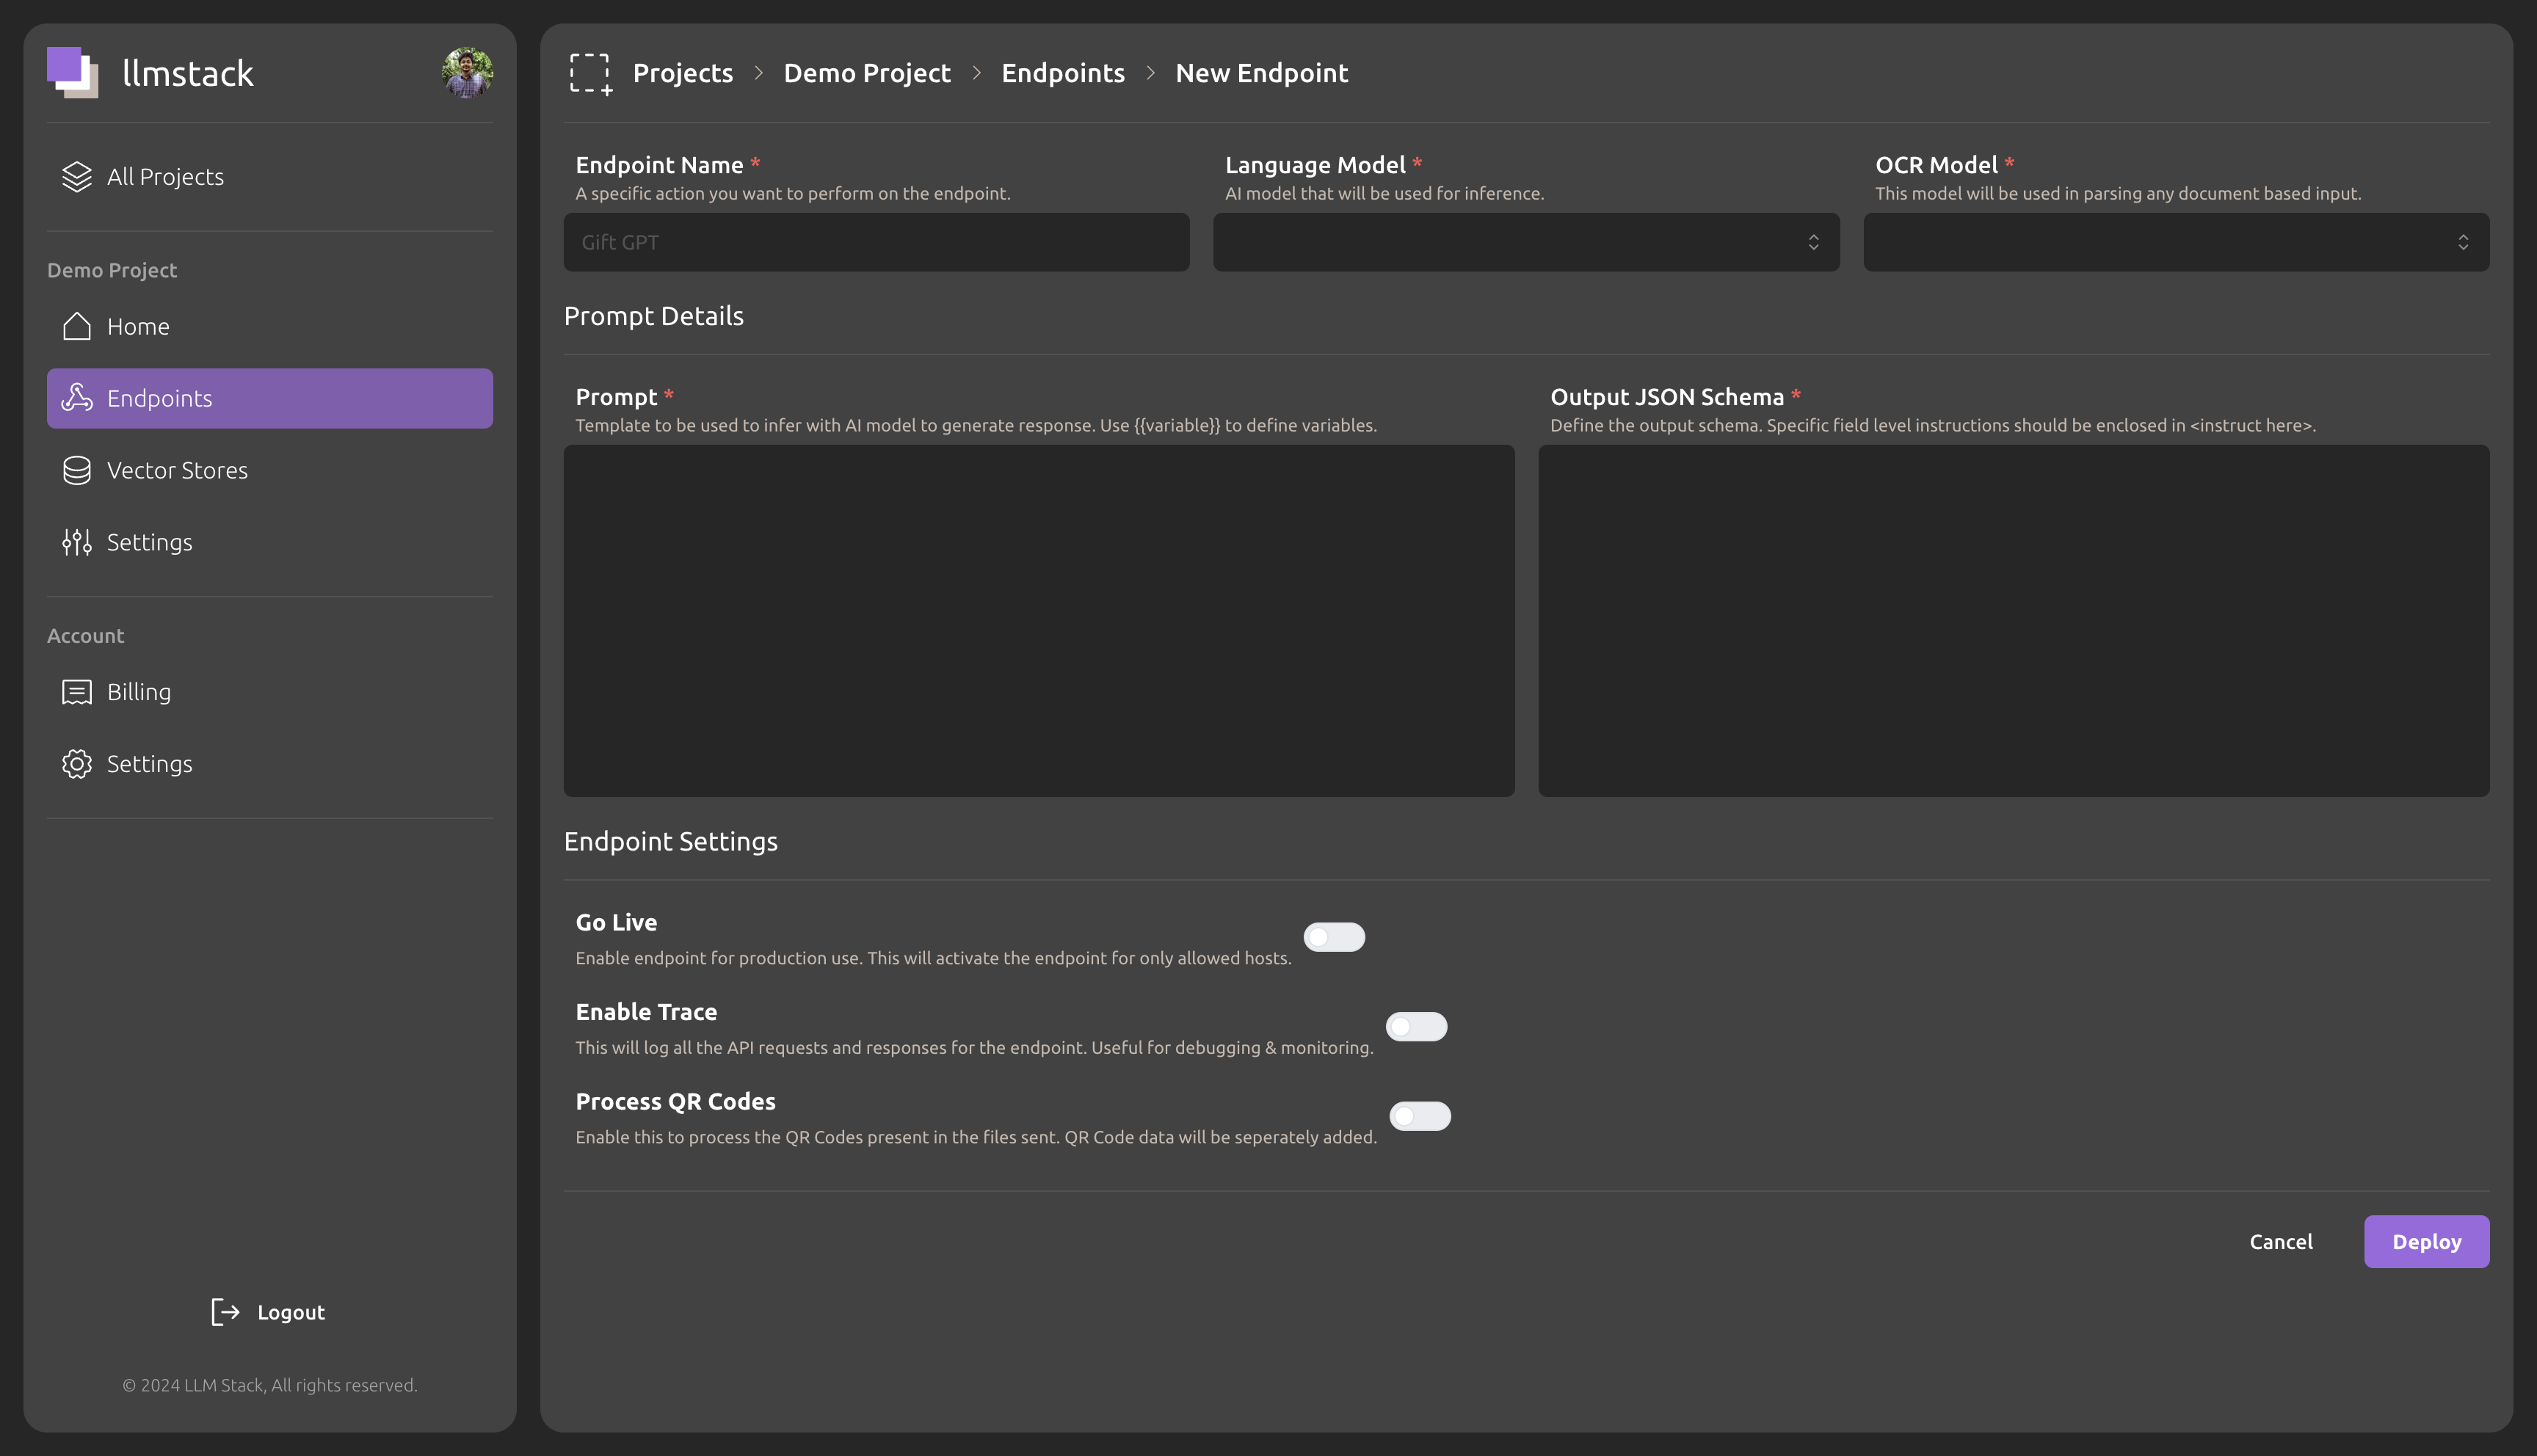
While creating an endpoint, you need to configure the following:
Language & OCR Model
Language model will be used to power this endpoint. We are constantly adding new models to the platform. If you have a specific model in mind, feel free to reach out to us.
The OCR model is used by the platform to extract text from images and PDF files. The platform supports multiple OCR models and you can select the one which works best for your use case.
OCR model is used only when the input data is an image or a PDF file.
Prompt (Instruction to the model)
The prompt is the most important part of the endpoint. It defines the task which the model will perform on the input data. You can write a simple prompt or a complex one based on your requirements.
- Supports defining variables which can be used to pass the input data to the model.
- The variables are defined using the
{{variable_name}}syntax. - Filters can be applied to variables. You can refer here for the list of filters supported.
- These variables will be replaced by the input data during the API call with the actual data passed.
For example :- Summarize the text: {{user_input}}. In this prompt, user_input is the variable to which the developer can pass the input data during the API call.
Output JSON Schema
The output JSON schema defines the structure of the output JSON which will be returned by the endpoint. You can define the structure of the JSON using the following format:
{
  "key1": "<instruction here, data type here>",
  "key2": "<extract invoice date in dd/mm/yyyy format, data type 'string'>",
  "key3": {
    "key4": "<instruction here, data type here>",
  }
}
The output JSON schema is used to define the structure of the output JSON which will be returned by the endpoint. The platform will validate the output JSON against the defined schema and return an error if the output JSON does not match the schema.
Input Types Supported
All the endpoints supports the following input types:
- Text
- Images
- PDF Files
- URL
These inputs are automatically detected by the platform and the model is selected accordingly. The inputs are passed to the endpoint based on the variables defined in the prompt.
Endpoint Settings
There are a few settings which can be configured for the endpoint, which help in defining the behavior of the endpoint:
- Go Live: Is a test or production endpoint.
- Enable Trace: Enable this to log the input and output data for each API call. This is useful for debugging purposes. (Note: Keep this disabled for production endpoints)
- Process QR Codes: Enable this to process QR codes in the input data. The platform will automatically detect QR codes in the input data and extract the content from them.
Endpoint Deployment
Once you have configured the endpoint, you can deploy it by clicking on the 'Deploy' button. The platform will deploy the endpoint and provide you with the endpoint URL which you can use to make API calls.
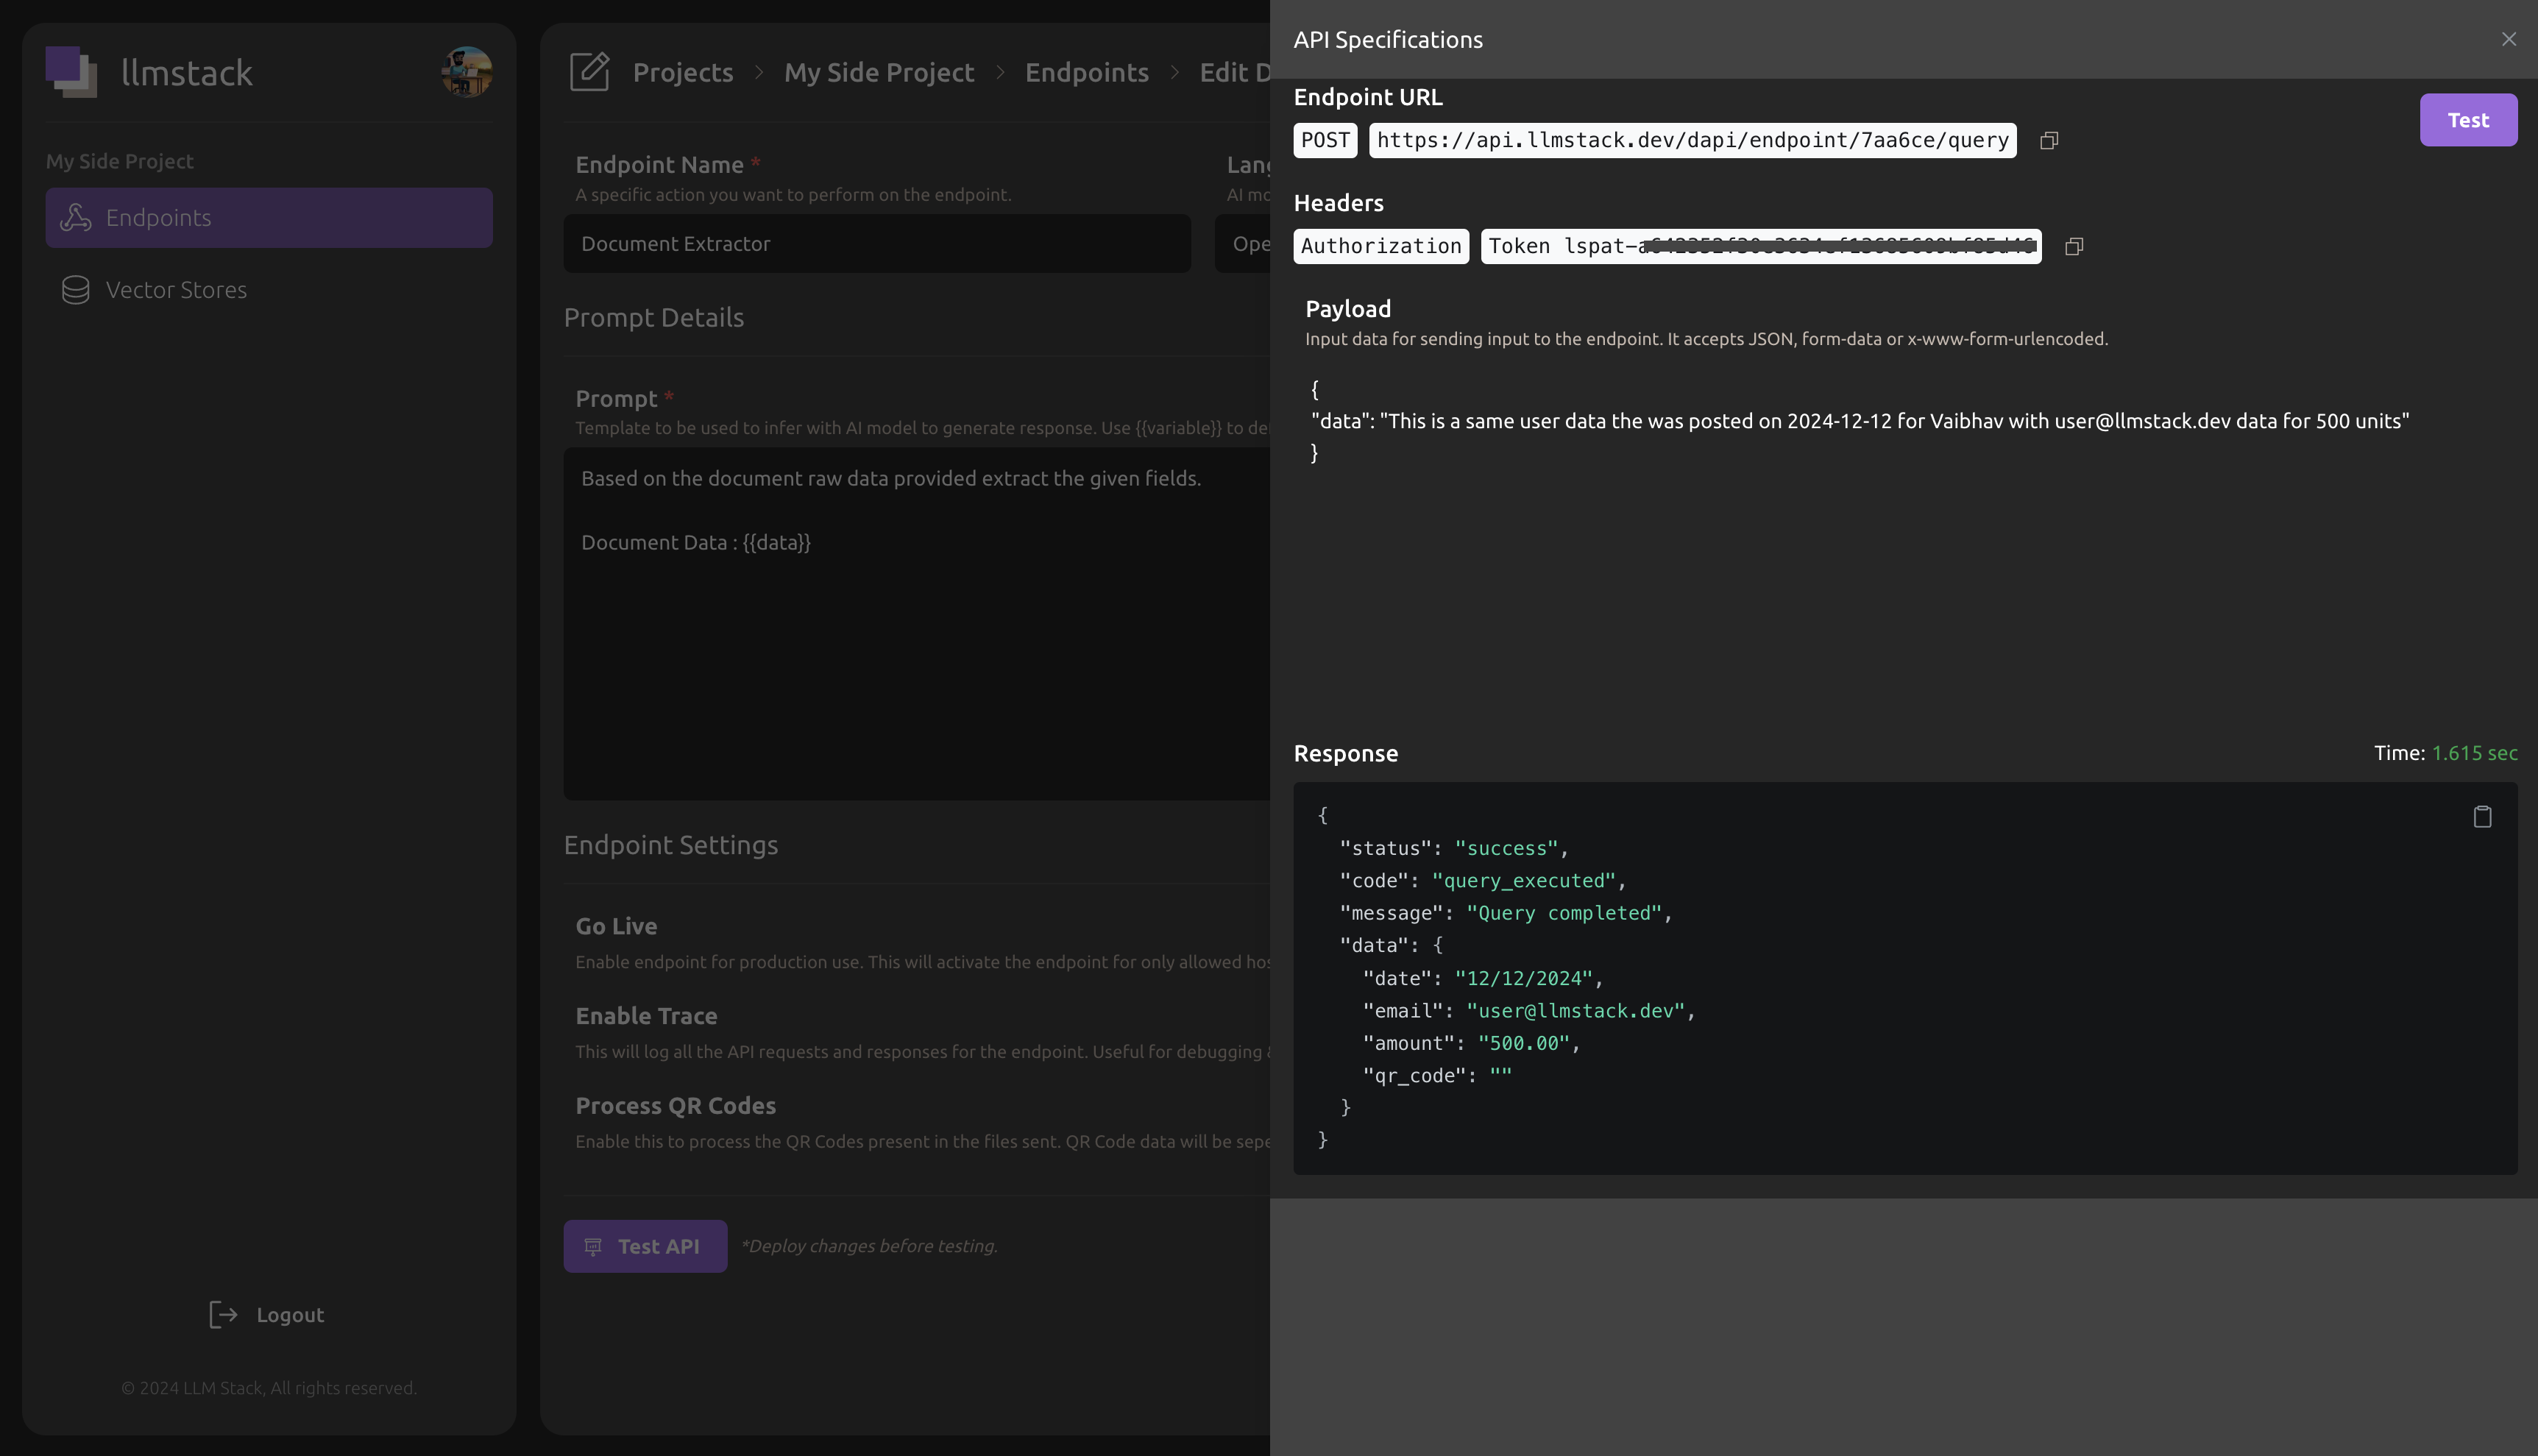
Making an API Call
Once the endpoint is deployed, you will get a 'Test API' button which you can use to make a test API call to the endpoint. You can pass the input data and make the API call. The platform will return the output JSON based on the prompt and output JSON schema defined by you.
Async API Calls
The platform supports async API calls for endpoints. You can make an async API call by appending /async in the provided endpoint URL. The platform will return a job ID which you can use to check the status of the job.
Please refer to the API Reference for more details on making API calls to the endpoint.